
I am done with the dishes. The kitchen floor is swept clean of crumbs and bits of chopped veggies. I now massage some lotion on my knobby fingers and veiny hands. I had let go of my household help for more than a year now, and the ritual of kneading lotion into my tired hands after some house work has become a habit.

As I massage my hands, I look at the lines on my palms that seem to get deeper and more defined as the years go by. The clear lines would make for easy reading by a fortune teller. She could tell from the breaks in my life line and the many tiny scars from cuts and burns earned in the kitchen that I am accident prone. How true indeed! But she would assure me that I will have a long life if I am just careful. She would know that I could be intense with my emotions just by noting the slight misshaped tip of my middle finger. An intensity born out of years of gripping and pressing hard on pencils and pens to get words on paper.
Inspecting the length of my fingers in relation to the length of my palm, she would declare that I would do well in the area of manual labor than playing the piano. My grandmother should have been warned about this before she took it upon herself to pay for years and years of piano lessons for me.

And of course, she would be happy to note I still have on my wedding ring and that the luster of the gold in my ring remains unchanged. This of course, only showed that I am content with my love life and that the gold in my ring is indeed 18 karats. She would also point out the callus that had developed beneath my ring finger. With conviction, she would inform me that I have been working hard to keep my relationship with my husband strong. But this could also be because I don’t wear any gloves when sweeping the floor or cutting the grass or gripping the ladle as I stir up some fried rice.
 |
| HHwH (Holding Hands with Hubby) |
As the lotion is quickly absorbed by my hands and fortune teller thoughts evaporate, I give a silent thanks for all the lines, veins, bumps and scars I’ve earned.
---xoxoxoxox---
There’s this comic strip by Dik Browne where the mother-in-law is giving advise to her daughter-in-law. I quote: Here’s a little marriage secret every young woman should know… “Youth and beauty are fleeting, but the ability to bake a good chocolate cake lasts forever.”
When it comes to pleasing my husband, it won’t be through a good chocolate cake. Instead, it will be through a melt-in-your-mouth and meat-falling-off-the-bone Pork Estofado the way his grandmother used to cook up for Sunday family gatherings.
This dish, although a bit tedious, is guaranteed to deepen your heart line as it has mine.
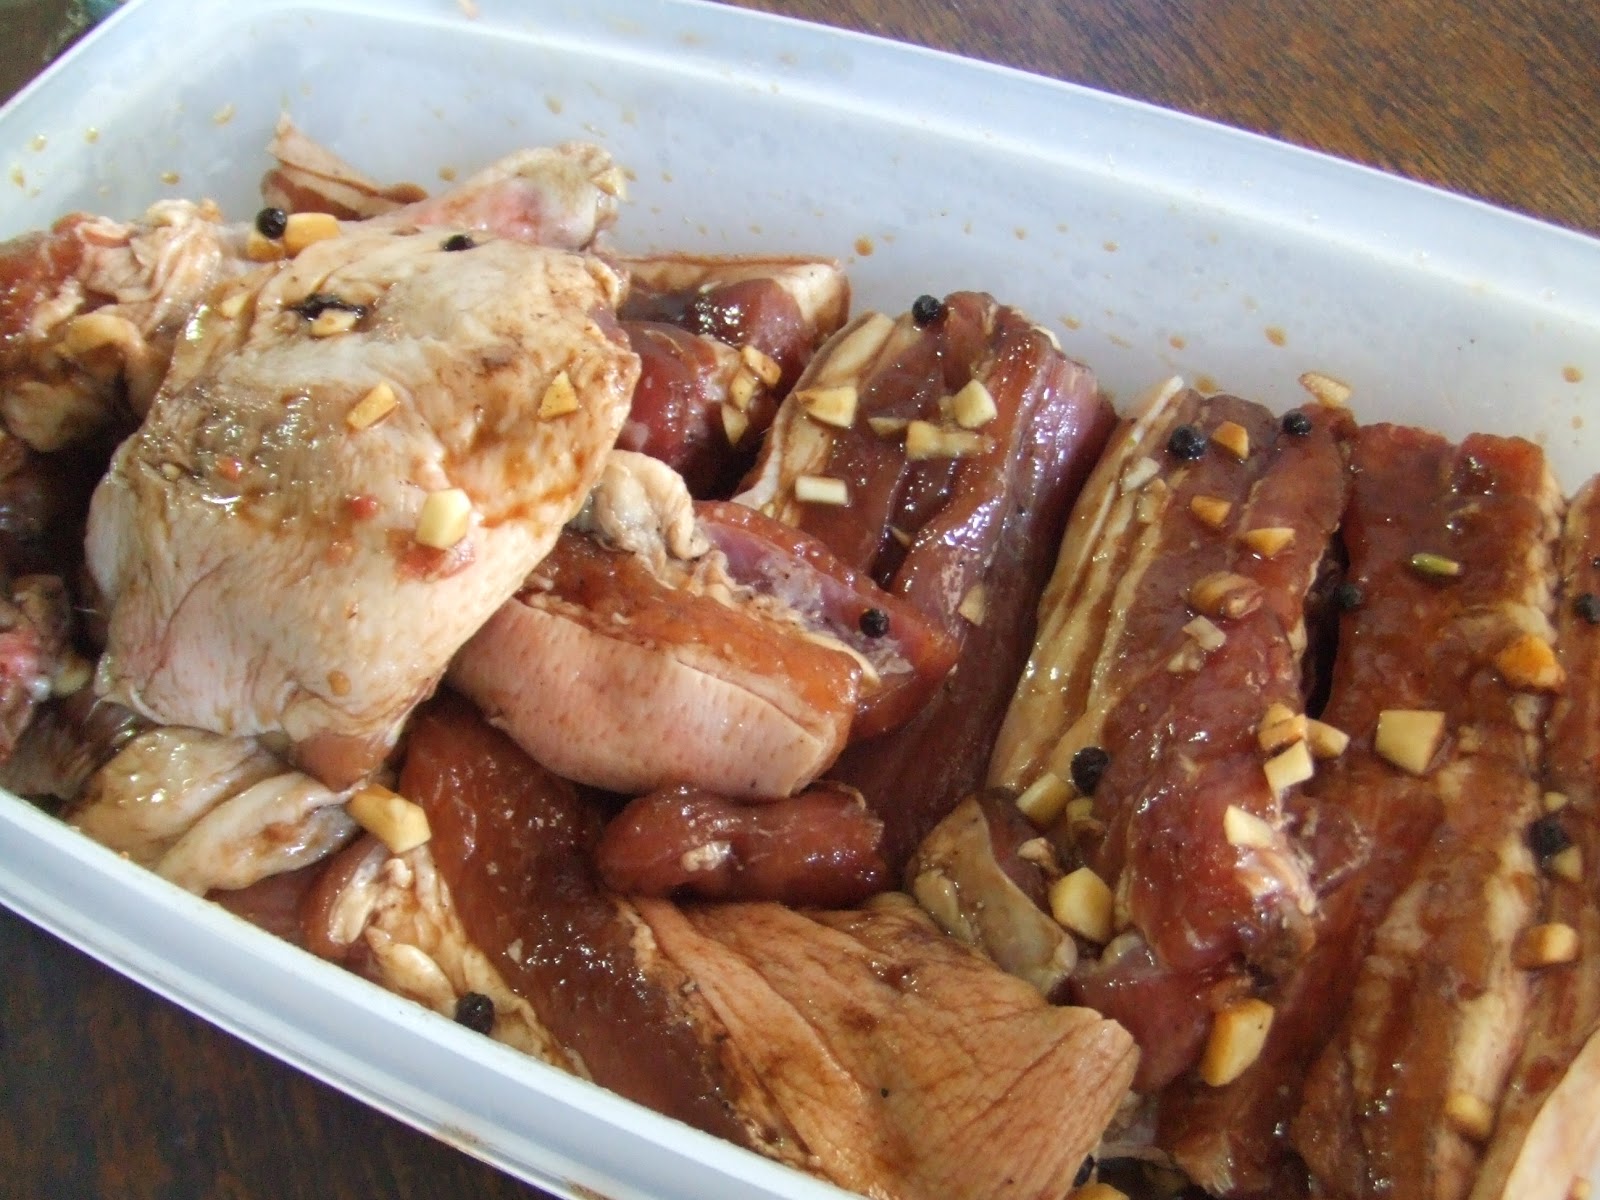
Mama Lingling’s Pork & Chicken Estofado
1 kilo of thick slices (at least1-inch thick) of liempo (pork belly) – find one that has the least amount of fat on it
1/2 k chicken legs & thighs
Marinate for pork & chicken:
2 T lemoncito juice
3 T dark soy sauce
1 T Kikoma light soy sauce
1 t salt
1 t whole peppercorn
4 cloves of garlic, chopped
Rest of Ingredients:
½ k ripe tomatoes, sliced into rings
1 large onion, sliced into rings
4 cloves of garlic, sliced
5-6 pieces of saba/cardaba (bananas for frying)—sliced horizontally and fried
3 potatoes, peeled and sliced into thick circles and fried
4-5 heaping tablespoon of brown sugar
1 250grams tomato sauce
1 chicken builion dissolved in 1 cup of water
Salt and pepper for seasoning

Procedure:
Step A
1. Marinate pork & chicken overnight or at least for 4 hours.
2. Fry pork & chicken until golden brown.

1. Fry bananas.
2. Fry potatoes.

Step C
1. In the bottom of a large pot, arrange one-third of the onions, tomatoes, bananas, and potatoes.
2. Next place the fried pork onto of the veggies. Do not over crowd.
3. Arrange the 2nd third of the onions, tomatoes, bananas and potatoes on top of the pork.
4. Add the remaining fried pork on top of this layer of veggies.
5. Arrange the remaining onions, tomatoes, bananas and potatoes on top of the pork.
6. Sprinkle the brown sugar over the contents of the pot, pour the chicken stock and the tomato sauce.
7. Season with a teaspoon of salt and about a dash or two of pepper.
8. Add enough water to barely cover the mixture.

Step D
1. Once the dish is brought to a boil, immediately lower the flame and cook very gently without stirring.
2. This will probably take about an hour or so.
Note: You might want to remove the chicken ahead of the pork as chicken tends to cook quicker than pork. This will ensure that your chicken has not disintegrated into the sauce.
3. Test for doneness when the sauce has thicken and the pork is fork tender : )
4. Adjust seasoning and serve with much pride and love.This dish taste even better the next day--- if there are any leftovers.

No comments:
Post a Comment